
Guides · Baking Basics
How to Bake Bread
Everything home bread asks of you, in the order it happens: flour, yeast, mixing, kneading, rising, shaping, scoring, and the bake. Plus a sourdough starter you can keep alive on your counter, and a fix for every loaf that goes wrong.
Watch a loaf come together, start to finish. Tap a speed to slow it down or fly through it.
The whole craft in 60 seconds
Bread, in 5 ideas
- Four things. Bread is flour, water, salt, and something alive to lift it. Everything else is a variation.
- Time does the work. Your real jobs are temperature, patience, and a properly hot oven.
- Dough talks. Learn the signs of ready dough and you can stop watching the clock.
- Steam makes crust. A Dutch oven is a steam room for one loaf, and it is the home baker's cheat code.
- Failure is data. Every flat or gummy loaf teaches one clear lesson. The table at the end of this guide names them all.
Start here
The four ingredients
Flour is the structure. Bread flour, at 12 to 14 percent protein, gives the chewiest, tallest loaves. All purpose flour works for nearly everything in this guide. Whole wheat drinks more water and builds weaker gluten, so swap in at most half until you know your dough. Rye brings deep flavor and very little gluten, which is why rye loaves are usually part wheat.
Water is the texture. Bakers talk about hydration: the water weighed against the flour. Most home loaves sit between 65 and 75 parts water for every 100 parts flour. Wetter dough makes a more open crumb and stickier hands. Drier dough is easier to handle and tighter inside.
Salt is flavor, and control. Use about 2 parts salt per 100 parts flour. It tightens the gluten and keeps the yeast from racing. Stir it into the flour rather than dropping it straight onto yeast.
The lift is alive: packaged yeast, or a starter you keep. The next two sections cover both. Everything after that in this guide exists to give one of them a good day at work.
The lift you buy
Yeast
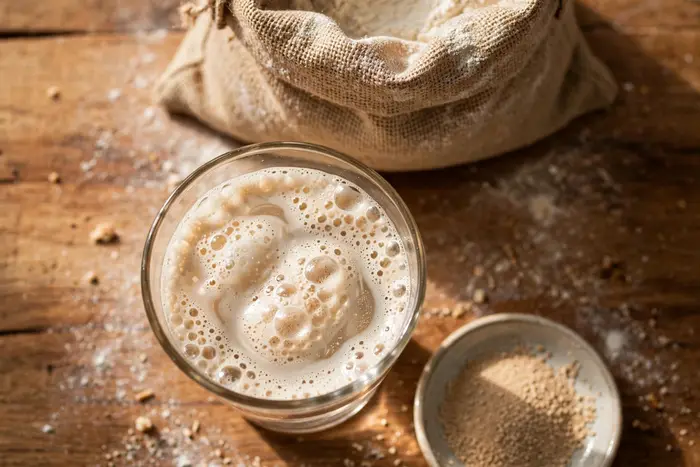
Yeast is a living fungus that eats sugars in the flour and breathes out gas and flavor. The gas is what lifts the loaf. Your job is to keep it fed, warm, and unhurried.
Instant yeast mixes straight into the flour and is the easiest place to start. Active dry yeast likes to wake up first: stir it into warm water and wait 10 minutes. If it foams, it is alive and ready. If nothing happens, it is dead, and no loaf will save it. Fresh yeast comes in a cake, spoils fast, and behaves beautifully if you bake often.
Water temperature is the one place beginners kill yeast. Aim for warm like a bath, 95 to 110°F (35 to 43°C). Hot tap water can be too hot. When in doubt, cooler is safer: cold water only slows yeast down, and a slow rise builds better flavor. That is why dough can proof overnight in the fridge, and why many bakers plan it that way.
The lift you keep
A sourdough starter
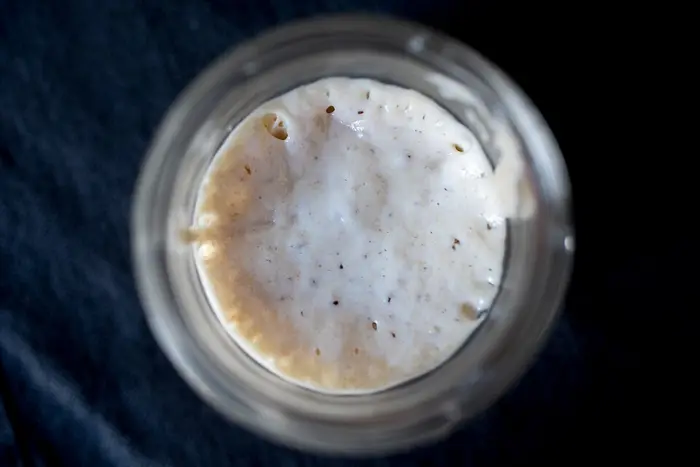

A starter is flour and water that has been colonized by wild yeast and friendly bacteria from your own kitchen. It lifts bread and gives sourdough its gentle tang. Think of it as a pet you feed flour.
Make one. Day 1: stir 50 grams of flour (whole wheat or rye works fastest) with 50 grams of water in a clean jar, cover loosely, and leave it somewhere warm, 70 to 75°F (21 to 24°C). Days 2 to 5: once a day, throw away half and stir in 50 grams each of fresh flour and water. Bubbles appear, vanish, and return. This is normal. Around day 5 to 7 the starter doubles within 4 to 8 hours of a feeding and smells fruity and pleasantly tangy, not like nail polish. It is ready.
Keep one. On the counter, feed it daily. In the fridge, feed it once a week, and give it one feeding the night before a bake, left out to peak. Ready signs: doubled, domed on top, full of bubbles, and smelling good. A spoonful dropped in water often floats, but treat that as a hint, not a law.
A dark liquid layer on top is called hooch. It means the starter is hungry, not dead. Pour it off, feed twice in a day, and it will be itself again.
Where bread starts
Mixing
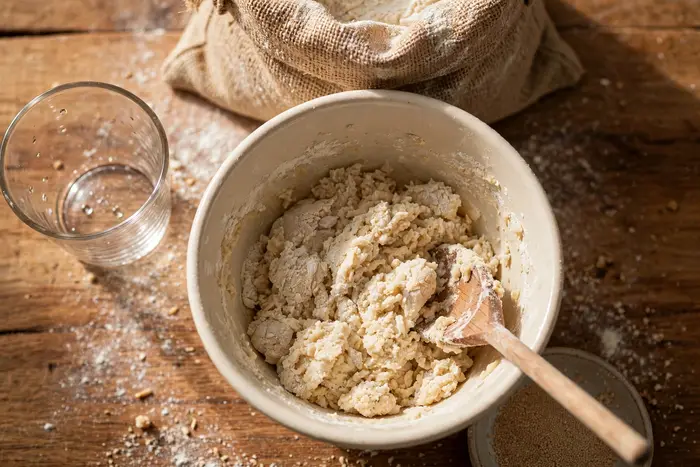
Combine the water and your lift in a big bowl, add the flour and salt, and mix until you have a rough, shaggy mass with no dry flour left. It will look like a mistake. It is supposed to.
Then wait. A rest of 20 to 60 minutes after mixing, called an autolyse, lets the flour drink the water and start building gluten on its own. Dough that has rested kneads in half the time and tears less. Add the salt after the rest if you want the full effect.
Judge the dough by feel. It should be tacky and a little unruly, never soupy. If it feels stiff as a rubber ball, work in more water a spoonful at a time. Recipes are a map; your flour decides the last 20 grams of water.
Building the net
Kneading
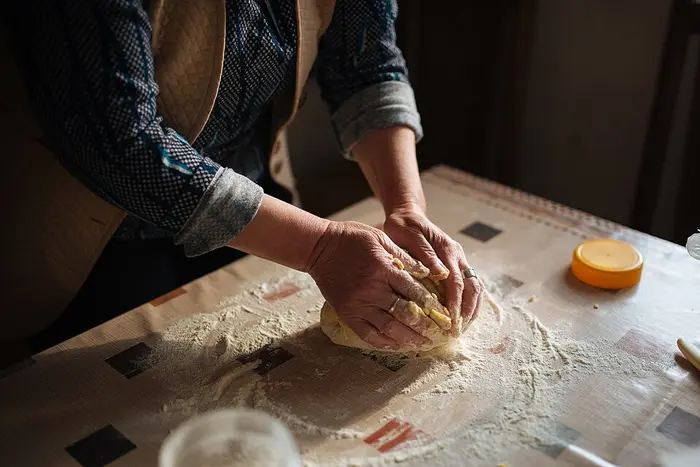

Kneading turns shaggy dough into a smooth net of gluten that can hold gas like a balloon. Push the dough away with the heel of your hand, fold it back, turn it a quarter, and repeat. Eight to ten minutes by hand is typical. The dough will go from rough and sticky to smooth, elastic, and only lightly tacky.
The windowpane test tells you when you are done. Stretch a small piece of dough between your fingers. Ready dough stretches thin enough to see light through it without tearing. If it tears right away, knead two more minutes and test again.
Very wet doughs refuse to be kneaded, so do not fight them. Use stretch and folds instead: with wet hands, pull one side of the dough up and fold it over itself, right in the bowl. Do this from four sides, every 30 minutes, four times during the rise. The dough builds the same strength with none of the wrestling. A stand mixer with a dough hook also works: medium low speed, and watch for the dough pulling cleanly from the bowl.
The rise
Proofing
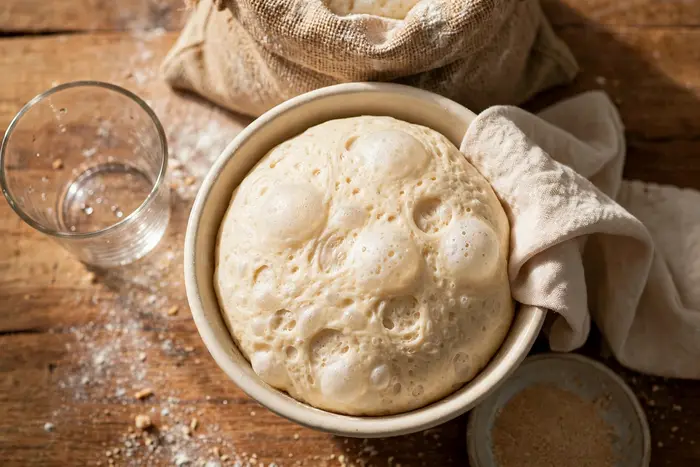
Proofing is the rise, and it happens twice: a bulk rise in the bowl after kneading, and a final rise after shaping. Cover the bowl so the dough does not dry out, and park it somewhere warm and still, ideally 75 to 80°F (24 to 27°C). Most doughs want 1 to 2 hours for the bulk rise, to grow by half to double, depending on the recipe and the temperature.
Read the dough, not the clock. Warm kitchens run fast; cold ones take their time. The poke test settles it: flour a fingertip and press the dough. If it springs straight back, wait longer. If it springs back slowly and keeps a small dent, it is ready. If the dent stays and the dough sighs, it has gone too far: bake it anyway, and expect a flatter, still tasty loaf.
Time is also an ingredient you can schedule. A slow rise in the fridge, 8 to 24 hours, builds deeper flavor, makes scoring easier, and lets you bake fresh bread in the morning from dough you mixed after dinner. Shape the loaf first, then chill it in its basket.
Tension is everything
Shaping
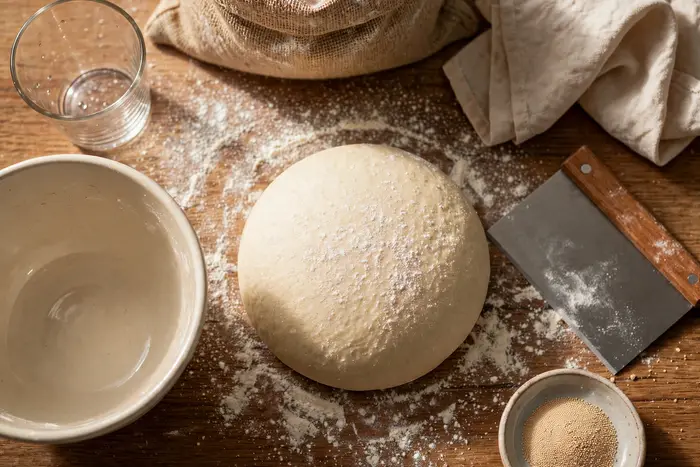
A loaf rises up only if its skin is tight. Shaping is how you build that tension. Turn the risen dough onto a lightly floured counter and press it gently into a rough round, keeping some of the gas. Fold the edges into the center all the way around, like closing a drawstring bag. Flip it seam side down and drag it gently toward you across the bare counter, a few short pulls, until the surface feels taut and smooth.
That is a boule, the round loaf this guide is built around. For a batard, fold the round into an oval the same way. For a pan loaf, roll the dough into a snug log, seam down, and settle it into a greased tin. In every shape the rule is the same: a tight, unbroken skin and a seam underneath.
Rest the shaped loaf seam side up in a floured basket or a bowl lined with a well floured cloth, covered, for the final proof of 45 to 60 minutes at room temperature, or straight into the fridge for the slow overnight version.
The loaf's chimney
Scoring
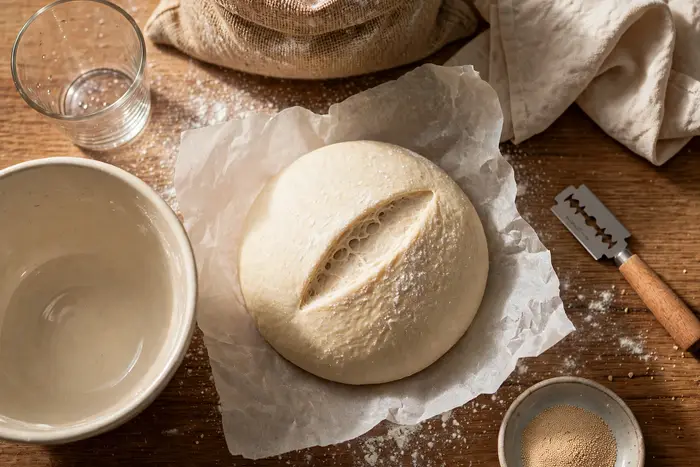
In a hot oven the loaf swells fast, and the gas and steam need an exit you choose. That exit is the score. Unscored loaves do not skip the exit; they burst open wherever they are weakest, usually along the side.
Use a lame (a razor on a handle), a plain razor blade, or the sharpest serrated knife you own. A wet or lightly oiled blade glides instead of dragging. For a round loaf, make one confident slash across the top, about a quarter to a half inch deep. Hold the blade at a shallow angle and the cut opens into a crisp flap bakers call an ear. For a simple cross, two slashes at full depth work just as well.
Score cold dough straight from the fridge whenever you can. It cuts like butter, holds its pattern, and gives the loaf its best spring. Commit to the cut: one smooth motion, no sawing, no second guesses.
Dutch oven first, steam always
Baking
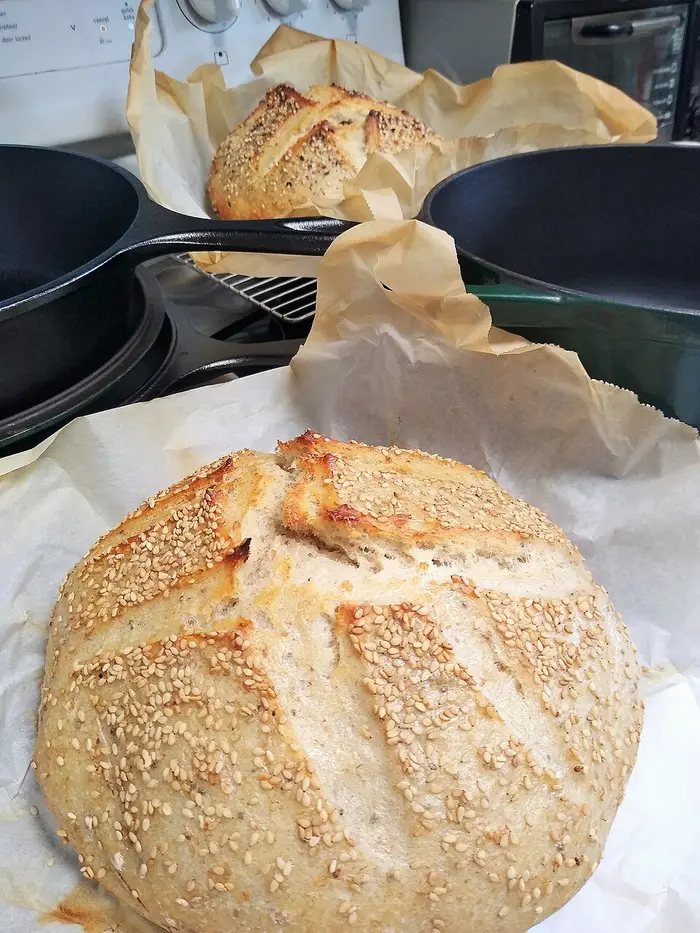

Crust is made in the first fifteen minutes, and it needs steam. Steam keeps the surface soft long enough for the loaf to fully swell, then lets it set into something crisp and deep colored. Professionals use steam injected ovens. Home bakers use a Dutch oven, which traps the loaf's own moisture around it. It is the most reliable piece of bread equipment ever sold.
The Dutch oven method. Put the pot and its lid in the oven and heat to 500°F (260°C) for a full 30 to 45 minutes. Turn the proofed loaf onto parchment, score it, and use the parchment as a sling to lower it into the screaming hot pot. Lid on, bake 20 minutes. Lid off, drop the heat to 450°F (230°C), and bake 20 to 25 minutes more, until the crust is a deep mahogany. Pale bread is underdone bread: be brave.
No Dutch oven? Bake on a hot tray or stone with a deep pan of boiling water on the rack below for the first 15 minutes, then remove the pan so the crust can dry and crisp.
Done sounds like this: the loaf is deeply colored, it feels light for its size, it sounds hollow when you tap the bottom, and a thermometer inside reads 200 to 210°F (93 to 99°C).
The hardest wait
Cooling and slicing
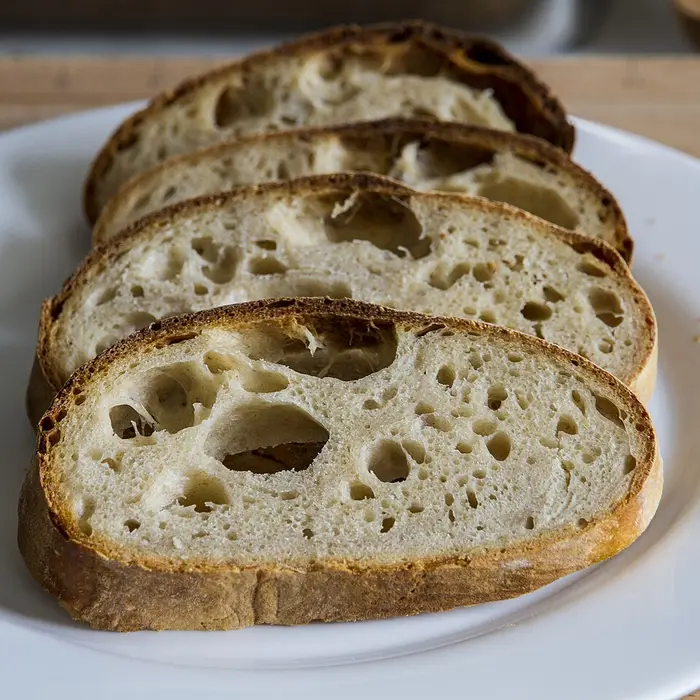

Out of the oven, the loaf is still cooking in a sense: the crumb is full of steam and setting as it cools. Slice within the first hour and that steam escapes through the cut, leaving the crumb gummy and compressed, no matter how well you baked it.
Cool on a rack so air reaches the bottom and the crust stays crisp. Wait at least one hour for a standard loaf, two for a big one. Then slice with a serrated knife in a gentle sawing motion, and admire the crumb you built: open, glossy holes in a custardy web is the signature of a loaf that was mixed, proofed, and baked with patience.
Keeping it good
Storing bread
Store a cut loaf cut side down on the cutting board, or in a bread box or cloth bag, for 2 to 3 days at room temperature. Keep plastic away from a crusty loaf: it softens the crust you worked for.
Never refrigerate bread. The fridge is where bread goes stale fastest, faster than the counter. The freezer is your friend instead: slice the whole loaf first, freeze the slices with parchment between them, and toast straight from frozen.
A stale loaf is not a lost loaf. Five minutes in a 350°F (175°C) oven brings yesterday's bread back to crisp life. Beyond that, stale bread becomes croutons, breadcrumbs, bread pudding, and the world's best toast soldiers for soup.
When bread goes wrong
Troubleshooting
Every baker has baked every row of this table. Find your loaf, read the cause, and change exactly one thing next time.
| What you see | What happened | The fix |
|---|---|---|
| The dough never rose | The yeast was dead, or the water was hot enough to kill it. | Bloom fresh yeast in warm, not hot, water. Foam in 10 minutes means alive. Check the date on the packet. |
| Dense, tight crumb | The loaf was underproofed, or too much flour got worked in during shaping. | Let the bulk rise finish (the poke test tells the truth), and flour the counter lightly, never generously. |
| Gummy streaks inside | It was sliced too soon, or it came out of the oven underbaked. | Wait the full cooling hour, and bake to deep color and 200 to 210°F inside. |
| One huge tunnel under the crust | Gas collected at the top because the shaped loaf went in underproofed. | Give the final proof its full time. A jiggly, puffy loaf is ready; a tight, small one is not. |
| Pale, soft crust | The oven was not hot enough, or steam stayed trapped too long. | Preheat longer, bake darker than feels safe, and vent steam for the second half of the bake. |
| Burnt bottom | The rack sat too low, or a dark pot pulled in too much heat. | Move up a rack, or slip a baking sheet under the pot as a shield. |
| The loaf spread sideways | The shaping had no tension, or the dough overproofed and lost its strength. | Shape tighter (drag the boule to build its skin), and bake a touch sooner next time. |
| Sourdough turned harsh and sour | The starter was hungry and the ferment ran long and warm. | Feed the starter twice before baking, use it at its peak, and shorten the warm rise. |
| Crust like armor | The loaf baked too long at low heat, drying out as it went. | Bake hotter and shorter, and let color, not the timer, call the finish. |
Put it to work
Bread recipes on Clear Recipe
Eight breads to practice on, roughly in the order this guide teaches them. Our full Sourdough Bread recipe joins the collection soon; until then, the starter section above and the Dutch oven method are everything it asks for.
- 01Rye BreadDark, hearty, and made for soup.
- 02Soda BreadNo yeast and no waiting. Baking soda does the lifting.
- 03FocacciaOlive oil, deep dimples, and a crisp golden edge.
- 04Dinner RollsSoft, pull apart, and gone in minutes.
- 05Garlic BreadThe best possible use of yesterday's loaf.
- 06Banana BreadSweet, spiced, and completely forgiving.
- 07Pumpkin BreadFall, in a loaf pan.
- 08CornbreadCast iron, golden, and ready for chili.